Connect with us: Please note that the preferred way of contacting IT Services is via LiveHelp Chat and Remote Support.

New MacBook Models / Chromebooks

Please note that certain Fanshawe College Programs use software that does not support newer MacBook Models, Google Chromebooks, or computers with non-Intel or non-AMD CPUs.
Please check the CONNECT Program Resources page for further details

Microsoft Azure for Education

Azure Education Support Guide

Having trouble accessing software, product downloads or product keys through Azure for Education? Follow the steps below to submit a support request directly to Microsoft.

Need help with Azure for Education?

Software previously available through Microsoft Imagine is now provided directly by Microsoft through Azure for Education. Use this guide if you experience problems accessing your software, downloads, product keys or Azure Education account.

This guide can help with
Product Downloads Product Keys Missing Software Account Access Azure Education Issues

How to submit a support request

Follow the eight steps below. Select any step to expand the instructions.

8 Steps
1
Open Support
2
Select Canada
3
Sign In
4
Select Issue
5
Create Request
6
Summary
7
Details
8
Submit
1 Open Microsoft Azure Education Support Start from Microsoft's Azure for Education support page.

Select the red Start a Microsoft Support Request button above.

The Microsoft Azure for Education support page will open in a new browser tab.

2 Select Canada Choose Canada from Microsoft's available support regions.

Under North America, locate Canada.

Select the Submit link shown in the Submit Online Request column.
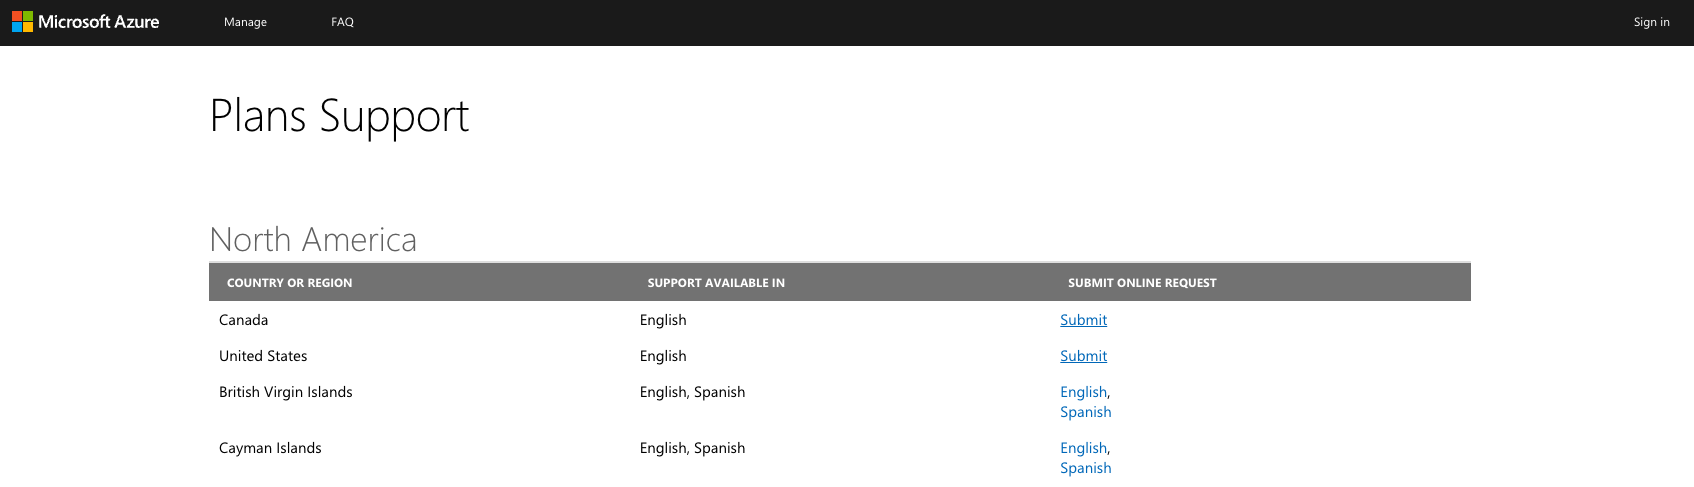
What you should see
Microsoft Azure support page showing Canada and the Submit link

Select the image to open it full size.

3 Sign in to Microsoft Engage Center Sign in before creating the support request.

Microsoft will redirect you to the Microsoft Engage Center.

Sign in using the Microsoft account associated with your Azure for Education access.
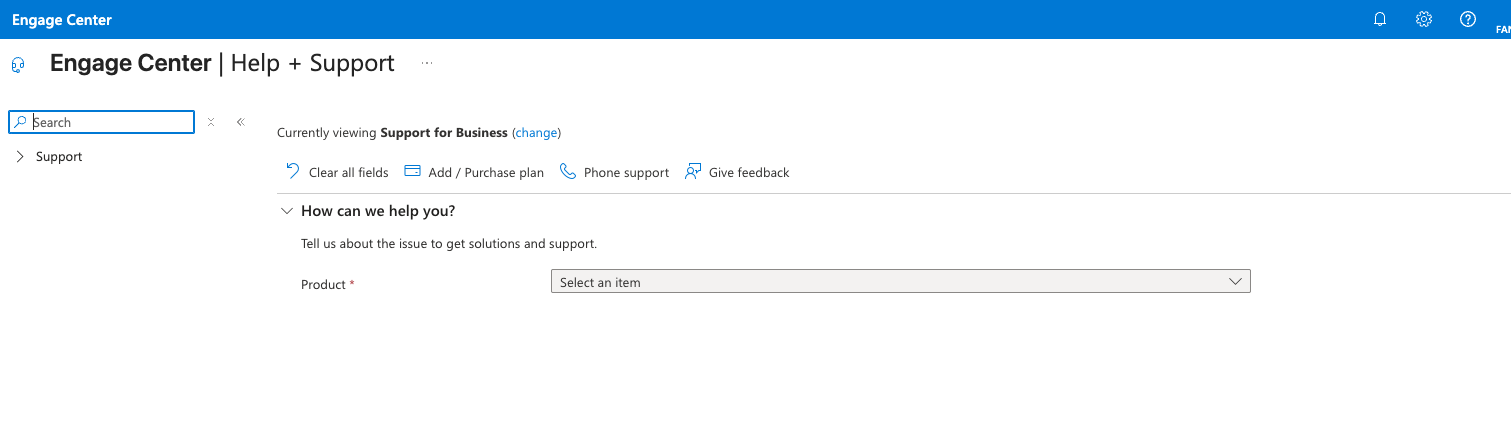
What you should see
Microsoft Engage Center Help and Support page

Select the image to open it full size.

4 Select Azure for Education and your issue Choose the product and problem type that best matches your issue.

In the Product field, select:

Azure for Education

Then select the Problem Type that most closely matches the issue you are experiencing.

Available choices may include:
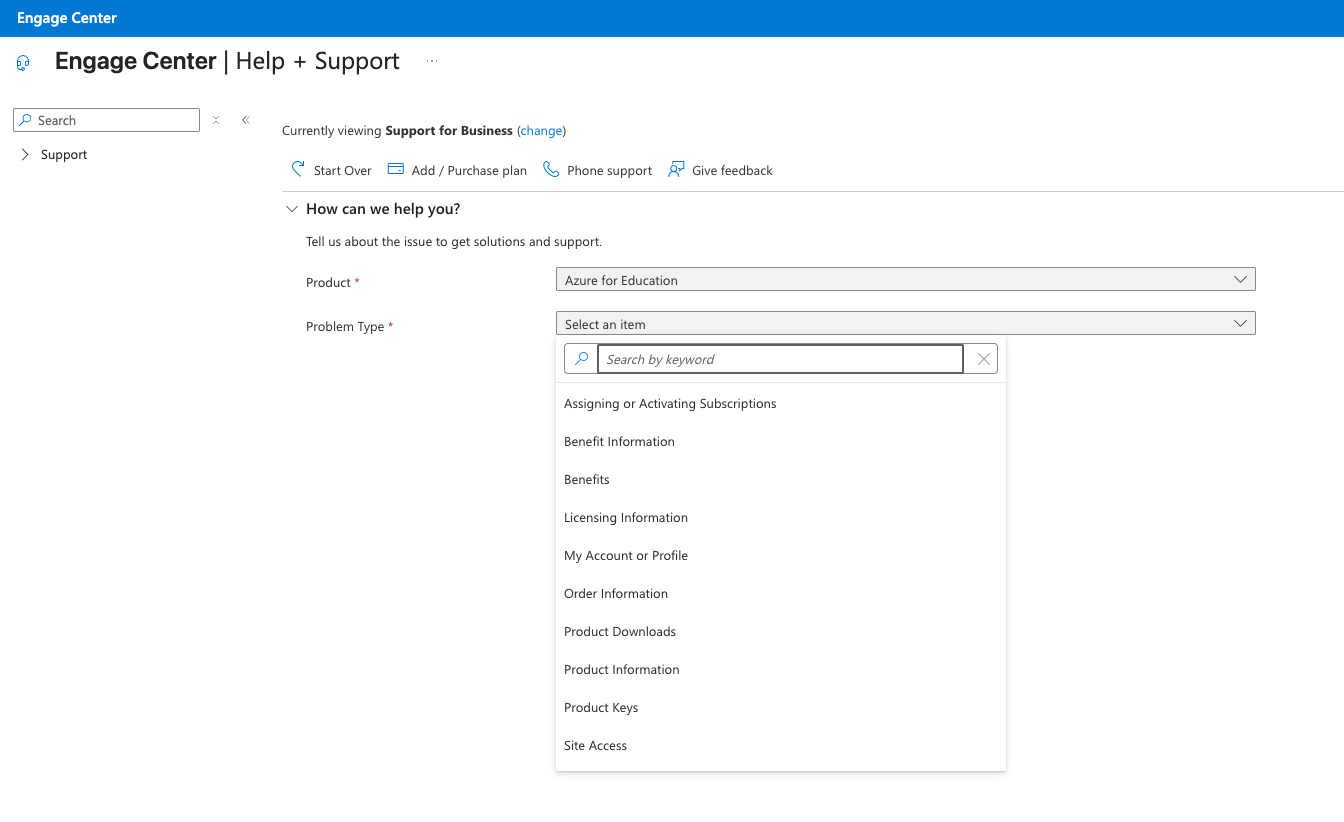
  • Assigning or Activating Subscriptions
  • Benefit Information
  • Benefits
  • Licensing Information
  • My Account or Profile
  • Order Information
  • Product Downloads
  • Product Information
  • Product Keys
  • Site Access
What you should see
Microsoft Engage Center showing Azure for Education and Problem Type options

Select the issue category that most closely matches your problem.

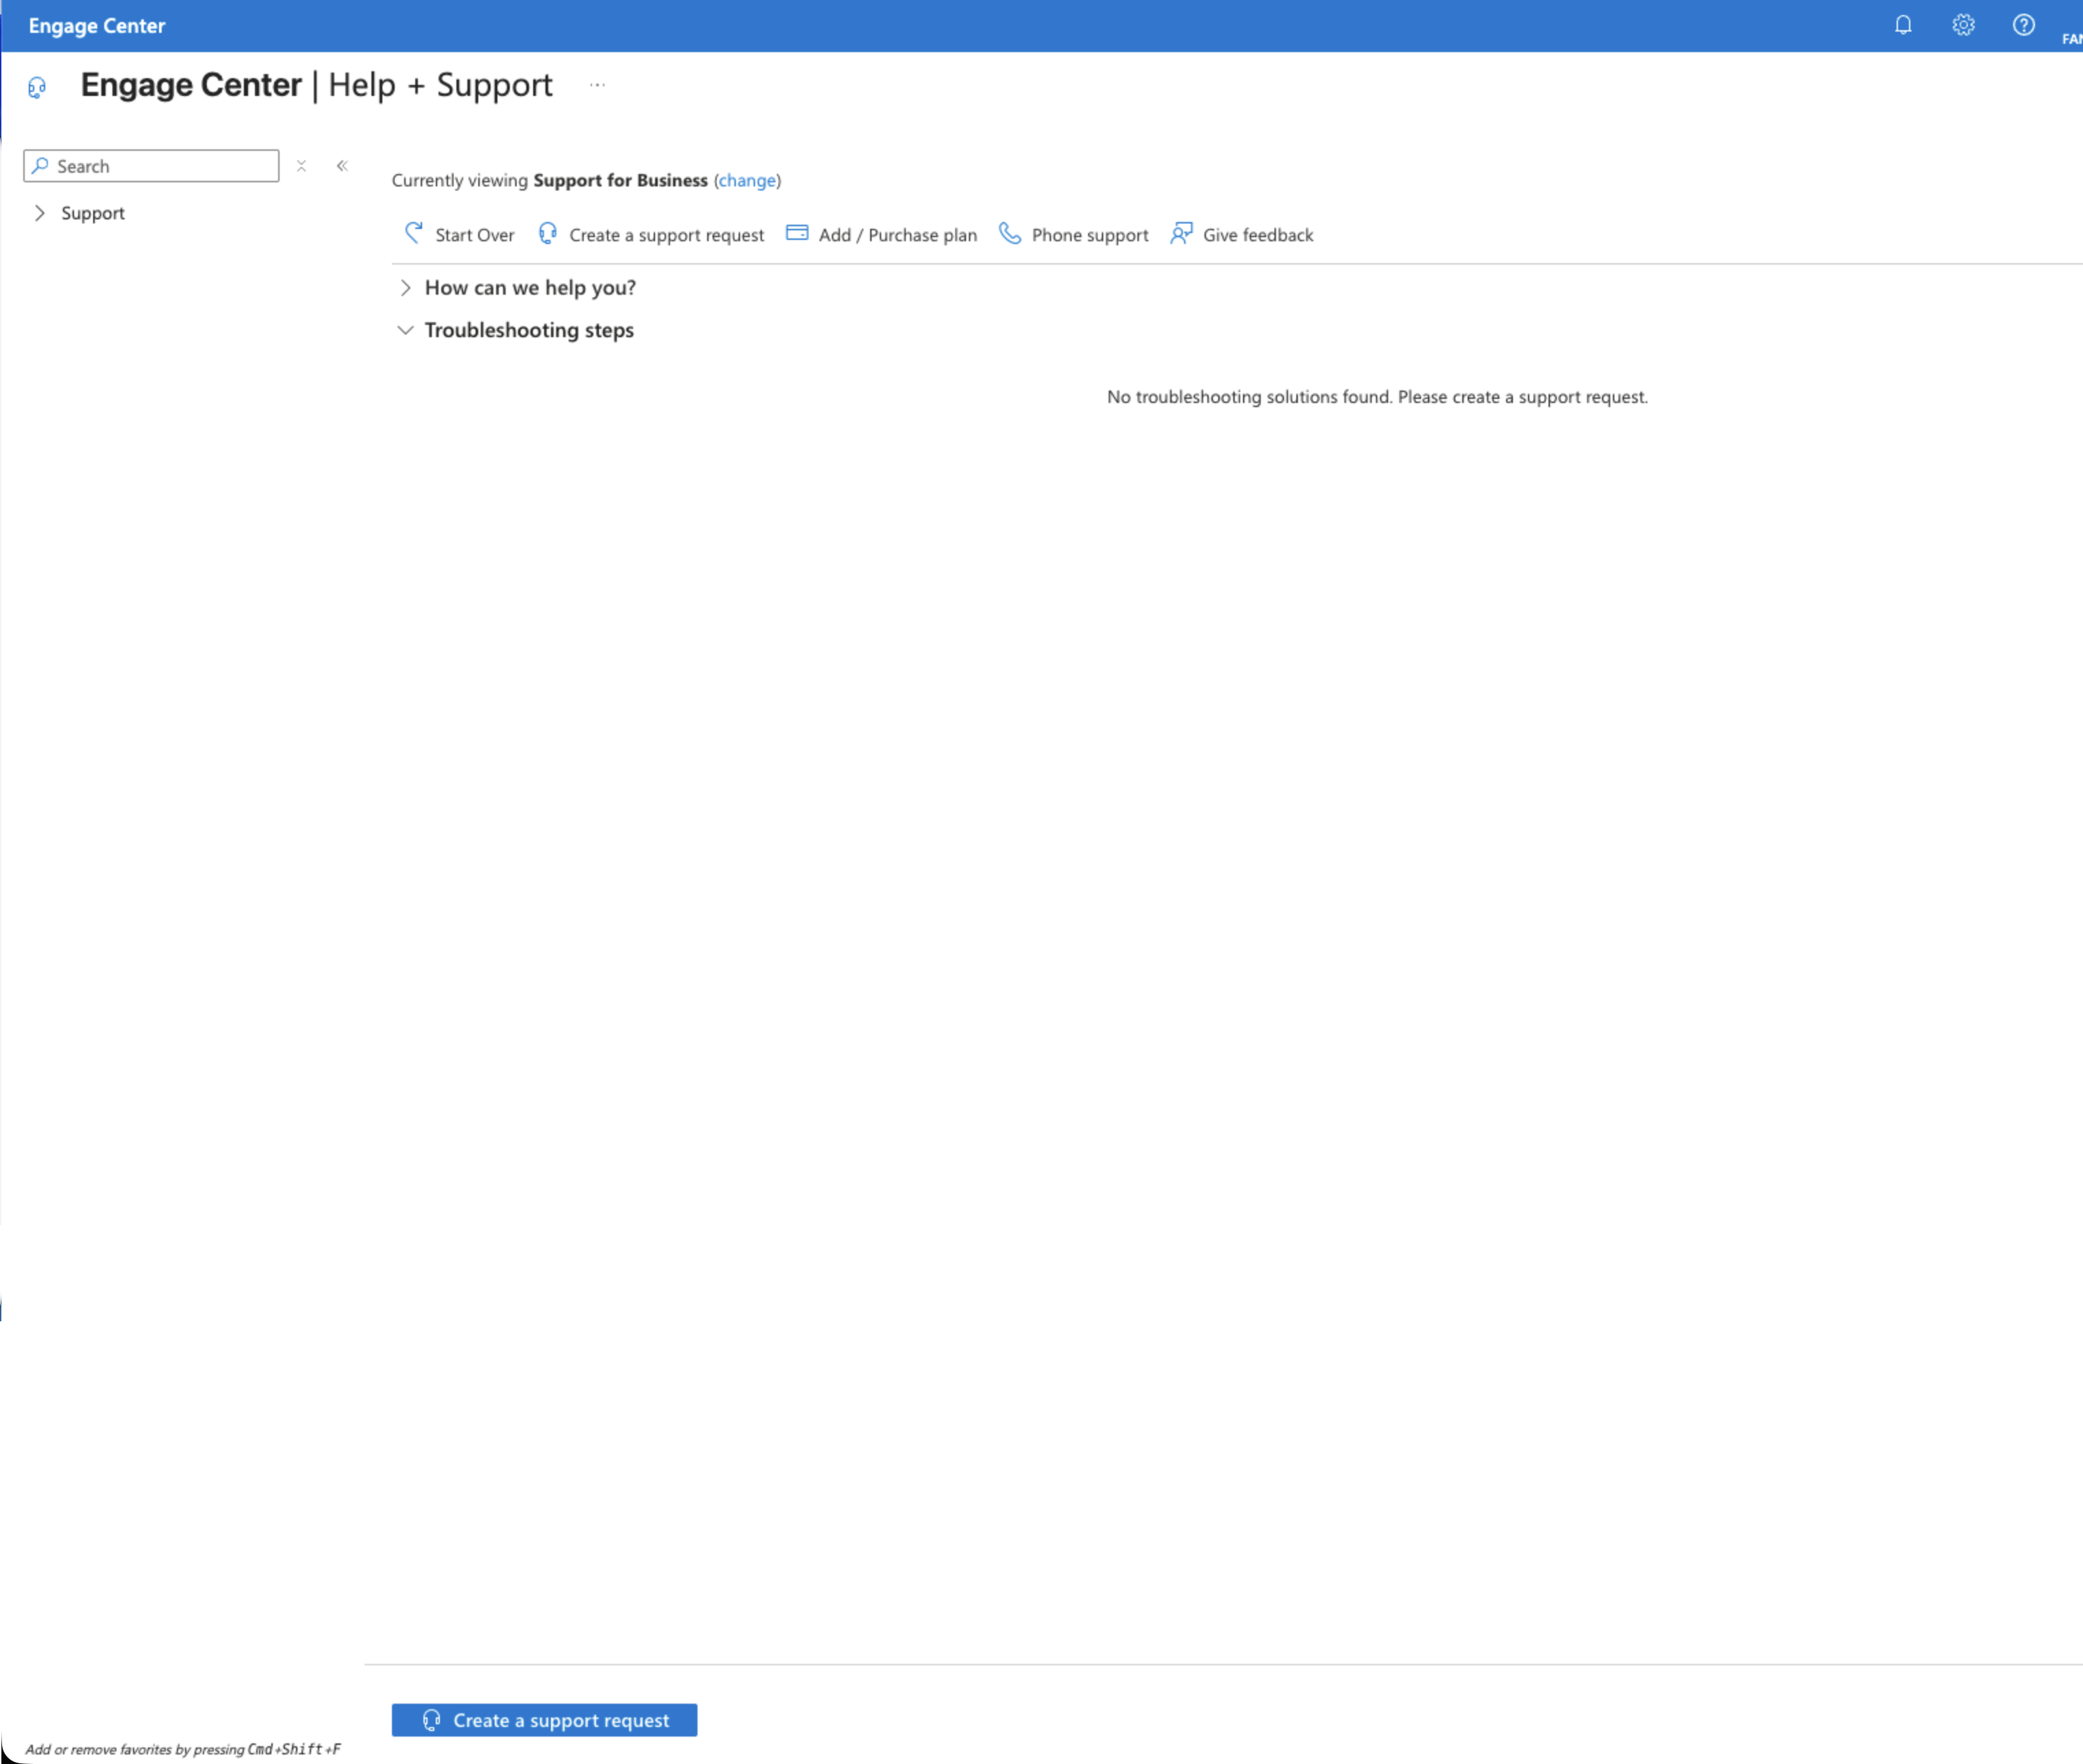
5 Create a support request If no troubleshooting solution appears, continue by creating a request.

After selecting your product and issue type, Microsoft may display:

No troubleshooting solutions found. Please create a support request.

Scroll to the bottom of the page and select Create a support request.
What you should see
Microsoft Engage Center showing the Create a support request button

The Create a support request button is located near the bottom of the page.

6 Enter the problem summary Provide a short description of the issue.

The New support request page will open.

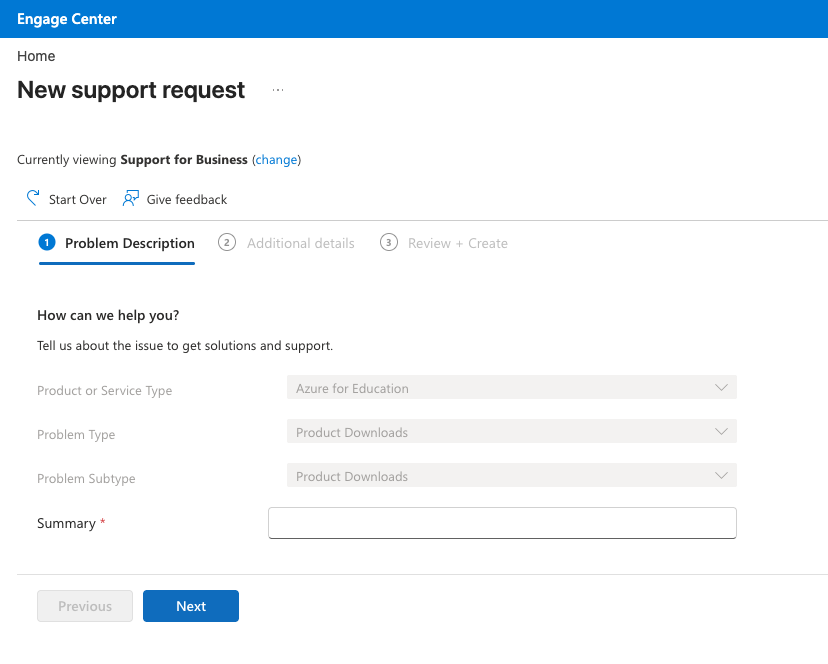
Confirm that the Product or Service Type, Problem Type and Problem Subtype match the issue you selected.

In the Summary field, enter a short and clear description of the problem.

Example: Unable to access Visual Studio product key

Select Next when finished.

What you should see
Microsoft New support request page showing the Summary field

Enter a short summary describing the issue, then select Next.

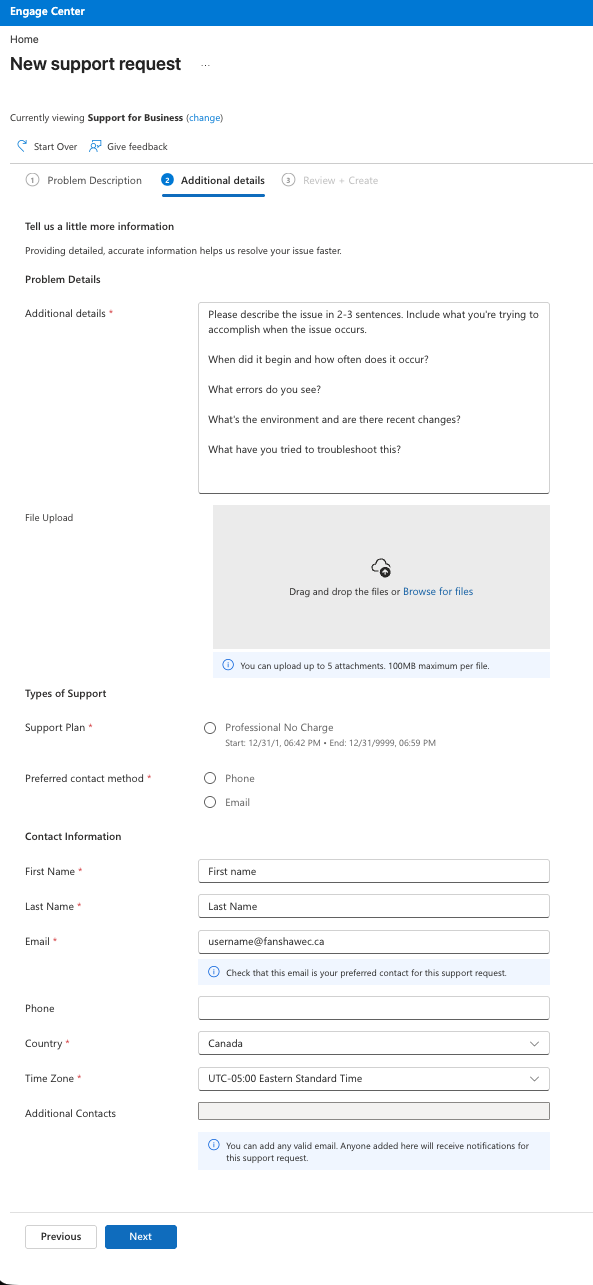
7 Add issue details and contact information Provide more information and confirm how Microsoft should contact you.

In the Additional details box, describe the issue in more detail.

Include useful information such as:

  • What you are trying to do
  • When the issue began
  • How often it occurs
  • Any error messages you see
  • What environment or device you are using
  • Any troubleshooting steps you have already tried

You may also upload screenshots or other files if they help explain the issue.

Under Support Plan, select the available default/no-charge support option shown by Microsoft.

Select your preferred contact method, such as Email or Phone.

Confirm your contact information, including:

  • First name
  • Last name
  • Email address
  • Phone number, if applicable
  • Country
  • Time zone

When everything is complete, select Next.
What you should see
Microsoft support request Additional details and Contact Information page

Complete the additional details, support method and contact information.

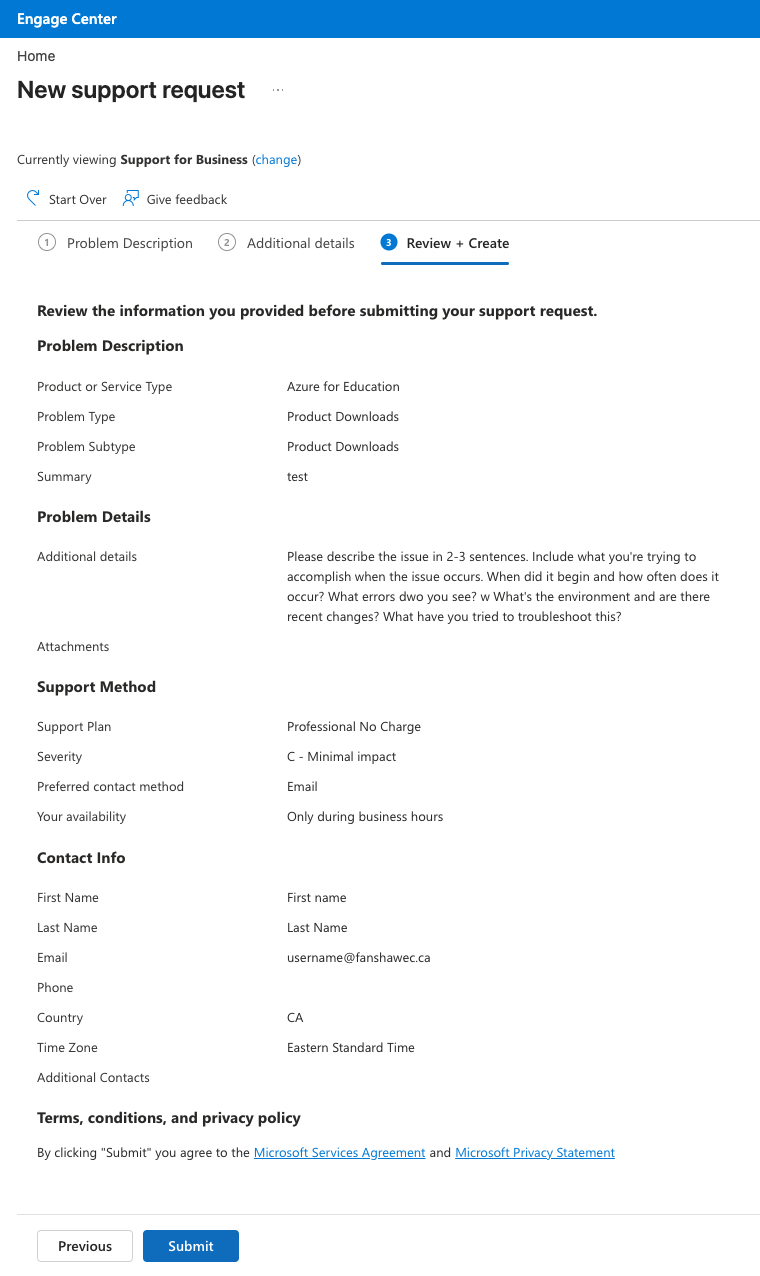
8 Review and submit your request Check all information before sending it to Microsoft.

Microsoft will display the final Review + Create page.

Carefully review:

  • Product or Service Type
  • Problem Type and Problem Subtype
  • Summary
  • Additional details
  • Support plan
  • Preferred contact method
  • Your contact information

If everything is correct, select Submit.
What you should see
Microsoft support request Review and Create page

Review the information carefully, then select Submit.

After submission, Microsoft Support will receive your request and follow up using the contact method you selected.